


Hey all,
After trying out Typeform’s new Contacts and Automations capabilities, I’ve put together a guide based on my experiences. Contacts and Automations lets you create contact lists from your typeform responses, then set up automations to nurture people through an email flow. Note: for a more general introduction to the feature, check out
BLUF (Bottom Line Up Front):
- This post assumes that you have added the Automations add-on to your Typeform account
- Automations for Forms and Contacts are currently different capabilities
- You need to set up and authorize your email domain if you want to use Contacts and Automations
- You need to create a Contact database
- The available Automation options are limited to a ‘linear’ email path at the moment
Getting started
Once you have added Contacts and Automations to your account, you need to do a few things to prepare yourself to get Typeform set up and working for you. Especially if you want to do some of the things that you see in the presentation that was given at Typeforum recently. Here’s the link to the presentation
Right now (December 2, 2025) if you choose Automations on forms, you will find that these are the existing Messages features. BUT there are additional features on the roadmap for 2026 – this from the Product and Support teams.
Setting up your Automations email domain
To use Automations with Contacts, you will first have to set up and authorize your email domain. You should start with this guide from Typeform on how to set up a custom email domain. It goes into great depth on what you need to do.
I strongly recommend you choose the "Manual Setup” option – based on issues that I ran into and resolved with the help of Typeform Support.
What you will see when you go through the steps, is a request to create DNS records with your domain provide, like this one from the guide:

I’ve circled some parts of the entries in the image because I found that I already had CNAME records for my domain that started with pdk1 and pdk2. All you need to do is change the number in the string ie change the pdk1 to pdk3 and pdk2 to pdk4 … that will work to get you authorized.
It might take from two hours to 48 hours to work through the DNS system but it will get done.
Once you do that, you can ‘check status’ in the Typeform settings and once you see the “Authorized” message beside your Automation Email Domain name, you are good to go.
Contact database and properties
This tends to be a wee bit tricky to understand – I have probably done something ‘sideways’ but it seems to work for my purposes. I am hoping that the Product team comes out with more details on this.
Start by reading this article on creating contact properties. It’s the base of where we start.
When you click on Contacts, you will see the default list of All Contacts. It’s going to be empty the first time you look at it but will have 4 default properties: Email, Name, Subscription Status, and Notes.
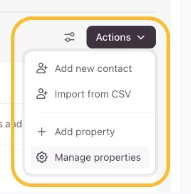
What we want to do at this point is add some custom properties to list – for each contact record that will be created in the list. To do this, click on the Actions drop down on the right of the screen and select Manage properties.
The reason you might want to add a custom property (or more) is to help in the segmentation of your contacts into different lists and to help drive some of the automations. Let me explain a little.
In my list of contacts, I want to know if someone signs up to a topical newsletter via a form. If they sign up for that newsletter, I want an email sequence triggered as the automation. If the same user responds to a feedback survey, I want them to be added into another email sequence. So I need some way to push these folks into a ‘contact list’ based on the form details. At the same time, since I am allowed to have only one contact record (in All Contacts) per email address, I had to come up with another way to try and record which forms the user had completed.
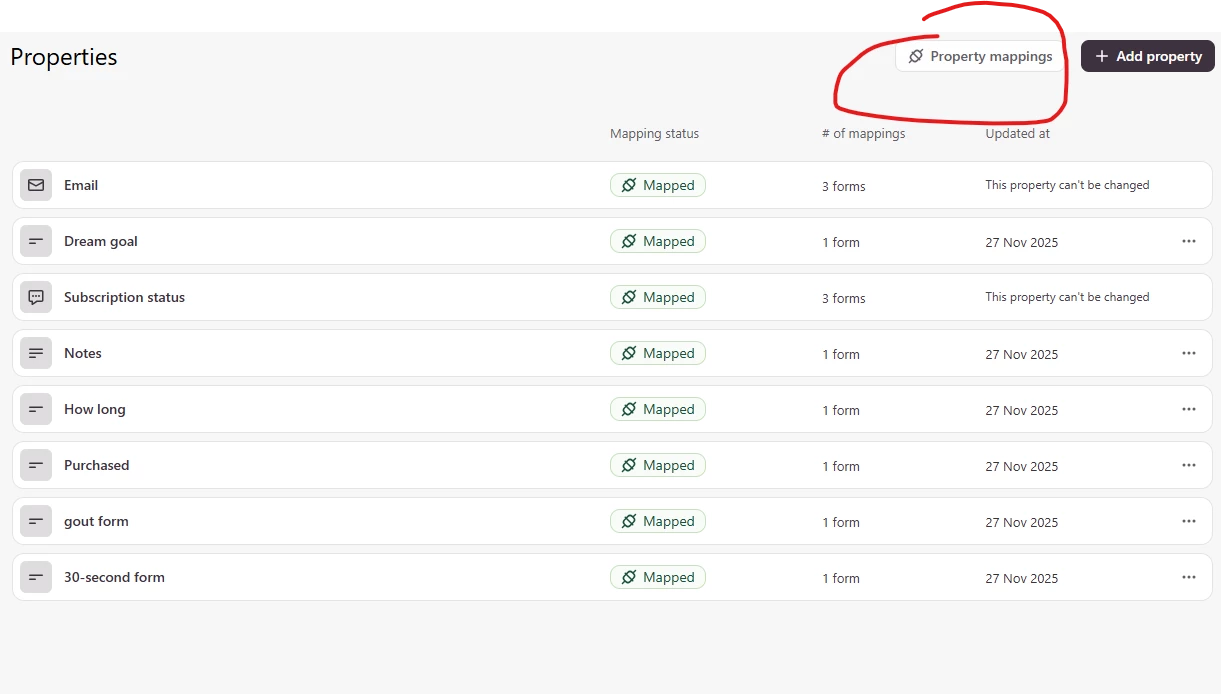
To do this, I created Contact Properties for each of the forms – if you look at the bottom of the image below you will see “gout form” and “30-second form” as two properties.

I’ll cover the ‘mapping’ shortly but the rationale for the form fields is to be able to map input from the separate forms into the contact record for the one user (an update to the contact record as opposed to creating a contact from the form submission for a new user/email address).
With these properties in place, when someone completes the gout-related typeform, the ‘gout form’ property is populated with the value stored in a custom variable in the typeform. If the typeform respondent is a ‘new contact’ they are added to All Contacts and, based on the value in the ‘gout form’ property, they are placed into the gout-related contact list. If the typeform respondent is an existing contact, then the ‘update’ to the contact record in the ‘gout form’ property would add the user to the gout-related contact list if they were not already there.
By adding a property for each form the user might complete, and using the ‘update’ capabilities, I can see at a glance for an individual user in the All Contacts list, which forms they have completed.
Now I can run separate automations for the addition of a new contact or updating a contact record and assigning them into different lists.
Note: if you are used to products like Kit or Mailchimp where you can create tags against a user record and trigger automations from the ‘tag’, you will find this method clunky but it is what is available at the moment. At least as far as I have been able to figure out.
Mapping properties to form responses
Once you have added your properties, you will want to map them to form responses/answers.
Click on the Property mappings button and Edit mapping.
This is where you can set up a form mapping and ensure that you have all the necessary information from the form(s) set up.
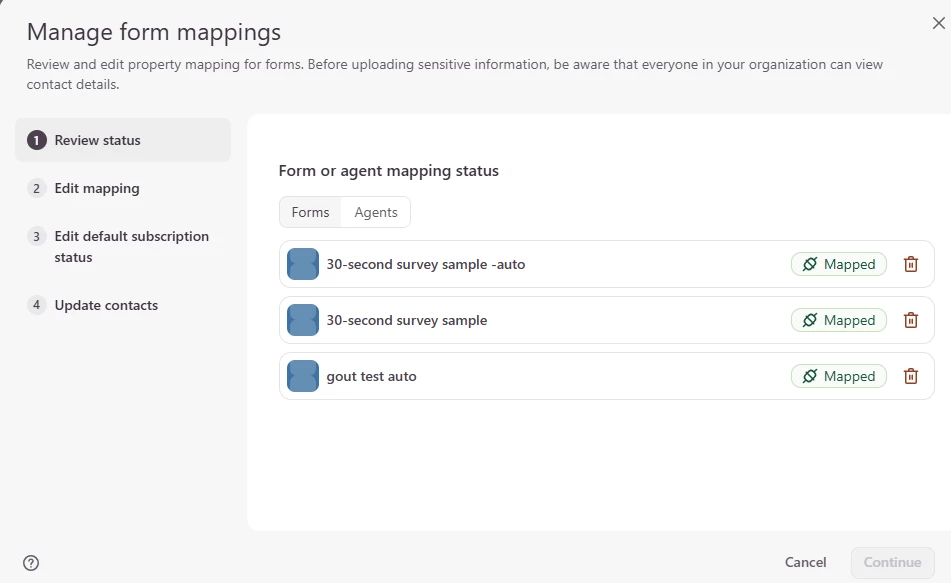
I’m going to select the first form on the list to show some of the mappings.
You can see in the image below, where I have mapped questions and variables from the typeform to the contact database properties.
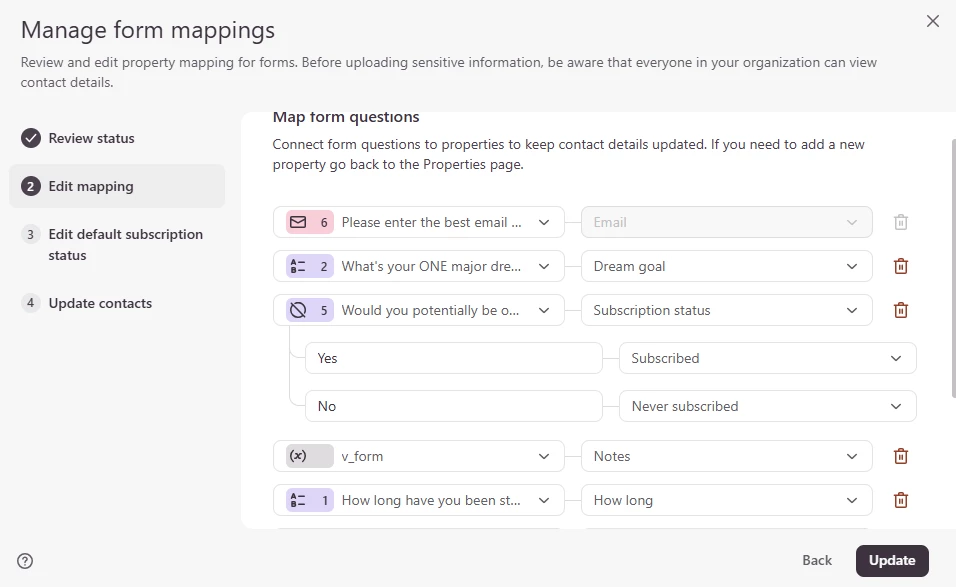
Not all the mappings are visible in the screenshot but you can see that Email is the key and you MUST have the Subscription Status field populated.
Here’s the mapping for that contact property ’30-second form’ – I based this on a question in the form that asks the user if they would be interested in hopping onto a short call to discuss their challenge. This is a trigger for me that someone has a sense of urgency to solve their problem and is a potential buyer.

Based on this value in the contact property, this user will be added to a specific list and into a nurture sequence that is designed for (potentially) motivated buyers.
In this step in the process, you simply map the form questions to the appropriate contact database properties.
The next step, after you hit the Update button in the bottom right corner, is to review/edit the default subscription status. I highly recommend that you set up your default to Unsubscribed and apply that default to new contacts to the list. This will be the setting if they have not completed a form that you have mapped to the subscription status property.
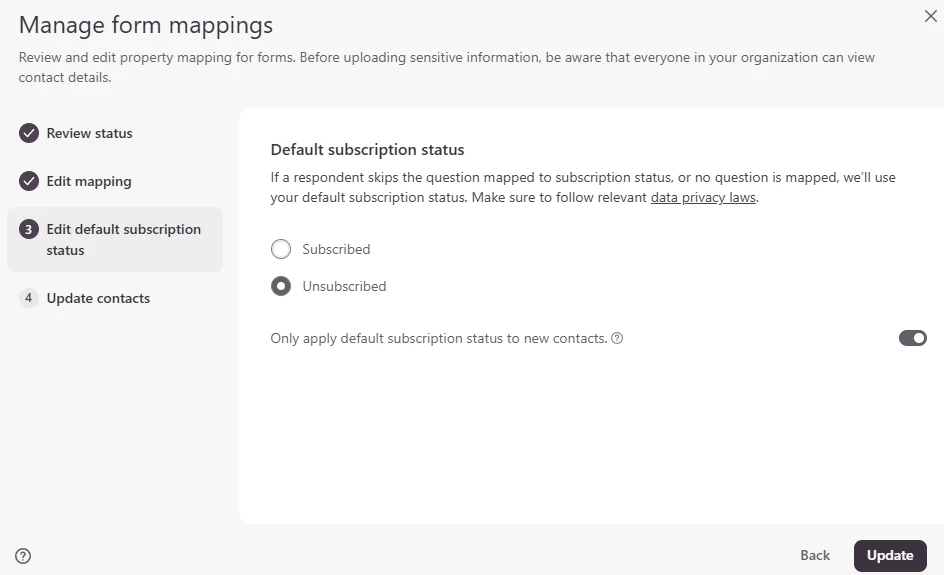
The last step is to determine if you want to update existing contacts with any changes. If you are setting up the triggers based on new form completions, then you can leave the Update contacts toggle ‘off’.
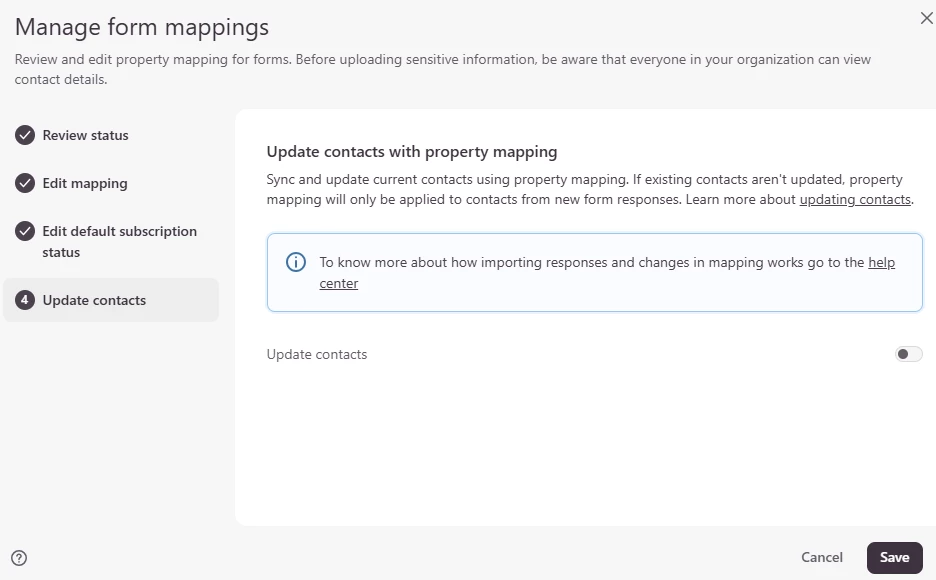
Click Save to lock in these mappings.
That sequence put values into the Contact record for users based on completing one form. Adding a second form to the mix and wanting to ensure that existing contact records were updated if they answers the gout-related form (my example) is the next step.
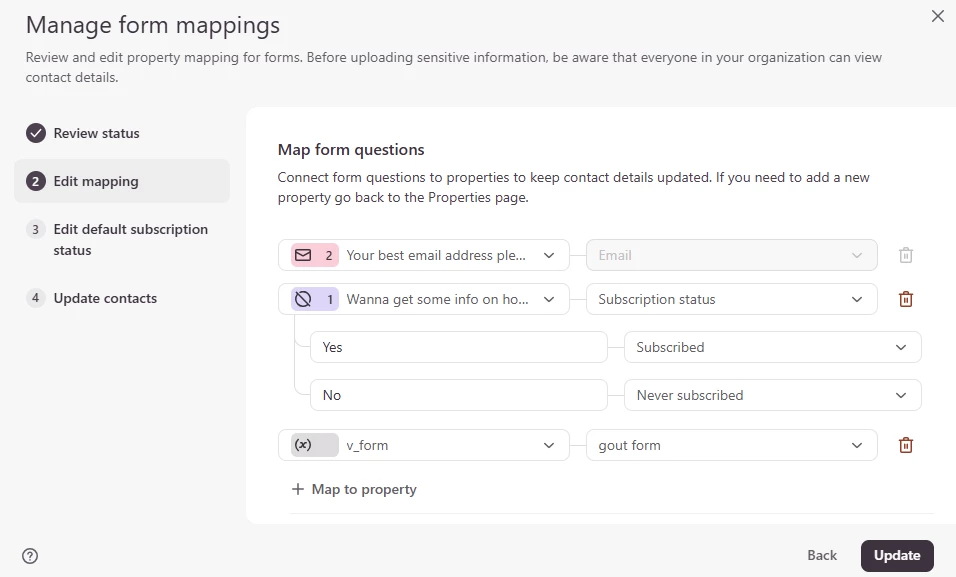
The image shows only three properties – email, subscription status and the mapping of the v_form custom variable to the ‘gout form’ property. That adds the trigger value into the property field.
If/when you have multiple forms you want to use to create and manage Lists. And this is where you can make use of the Automations features.
Creating a contact list
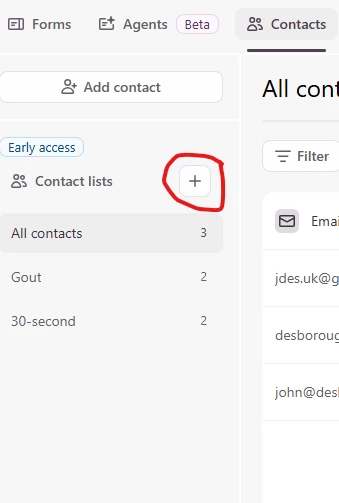
On the Contacts tab, you will need to click on the + sign to add a new contact list.
At this point you’ll get the form below – you need to enter in the name of your list and then choose the Filter you want to use to add people to your new list.
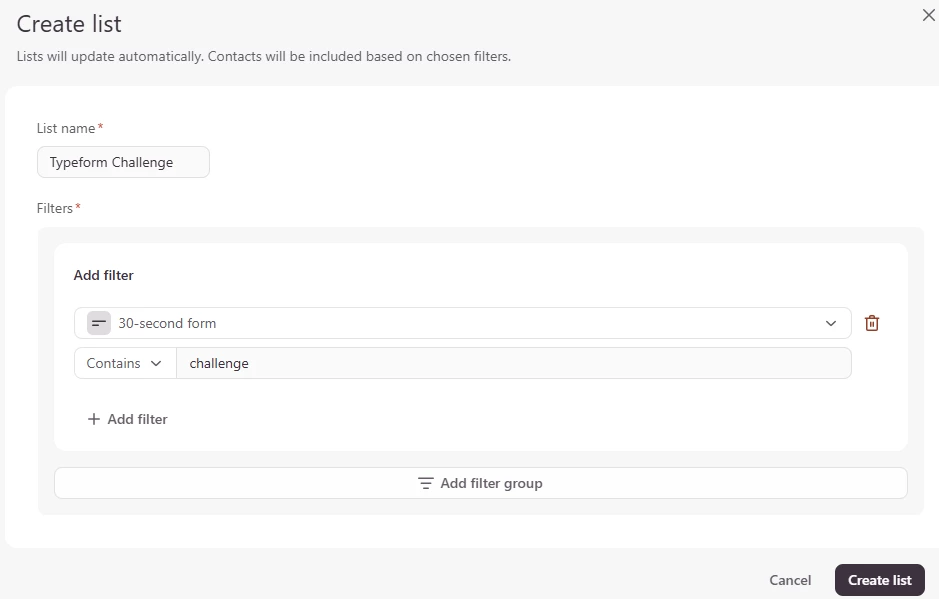
Note that I have based the filter on the contact property “30-second form” containing the word ‘challenge’ in the field. That word will be the value that is mapped into that field from a form mapping. Once you click Create List, your new contact list will appear.
Creating your first automation
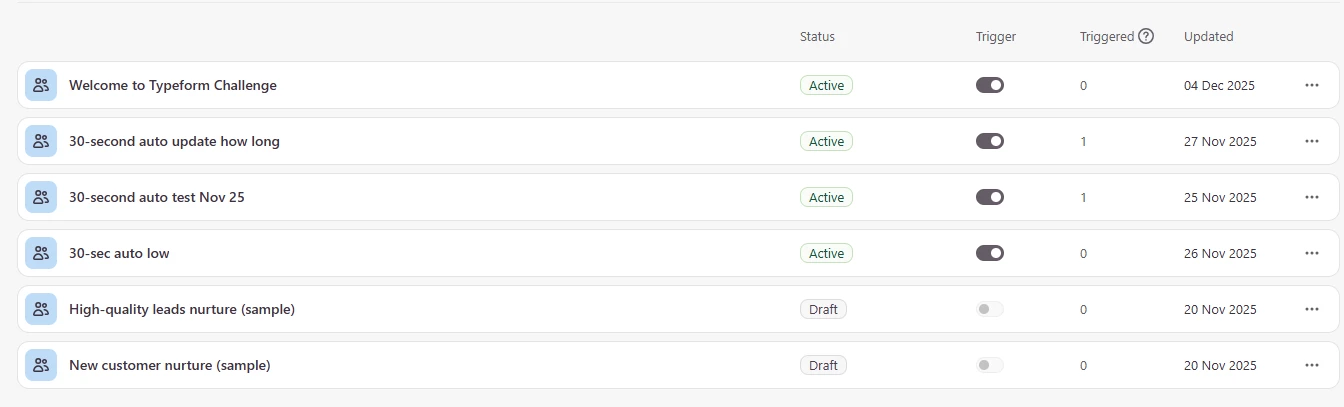
Click on the Automations tab and will see the list of automations that are currently available. Typeform has provided two sample automations (at the time I am writing this) that you can use to walk through if you choose.
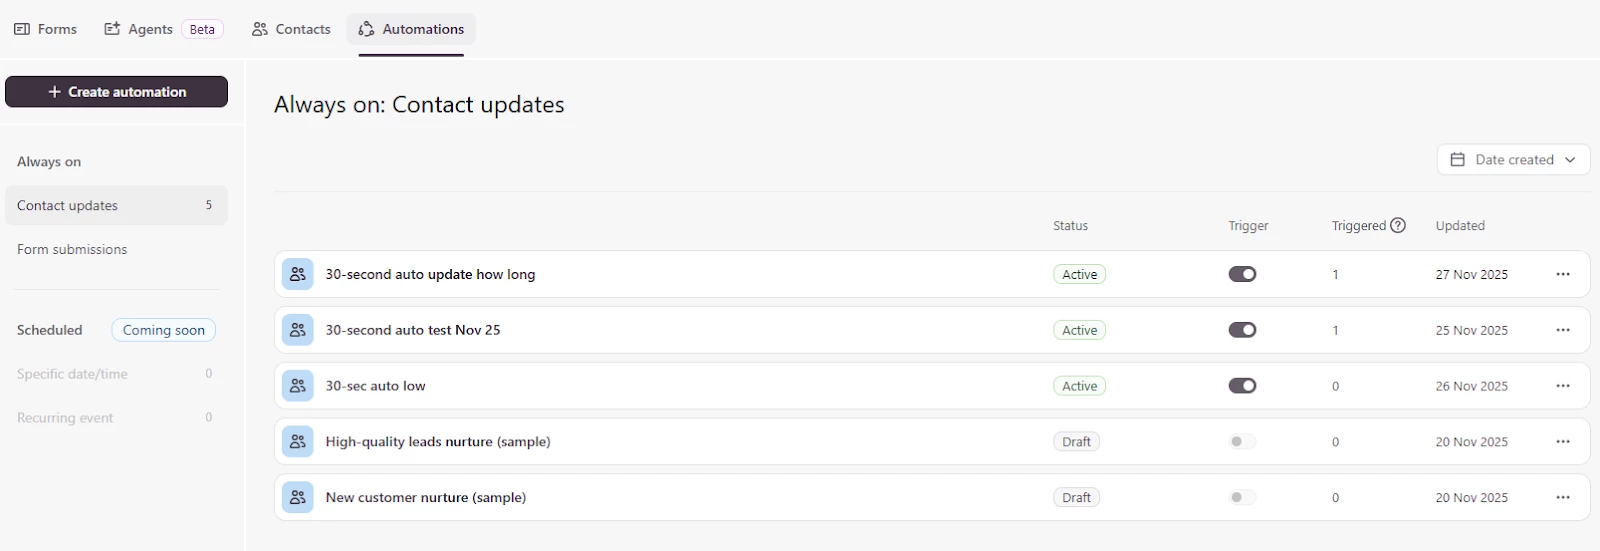
The samples from Typeform are the two at the bottom.
You’ll notice in that image that I have created 3 automations and have turned the “Trigger” toggle to Active. These automations will run if the conditions that start them are met.
Let’s look at how you create the automation and get it active.
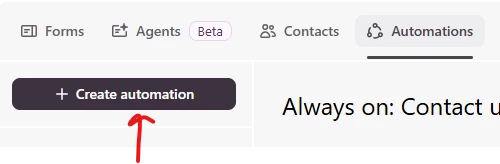
Start by clicking the Create Automation button:
You’ll see the following screen, which allows you to select how your automation will be triggered.
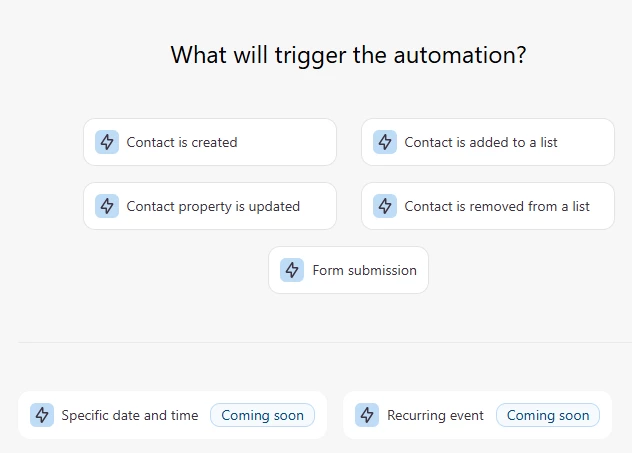
Note that if you choose the Form Submission option, you’ll end up in the Messages area which allows you to send an email back to the respondent. More functionality is coming from Typeform in this area in 2026.
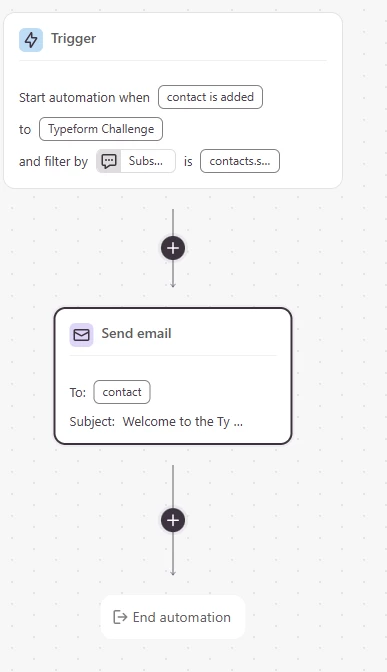
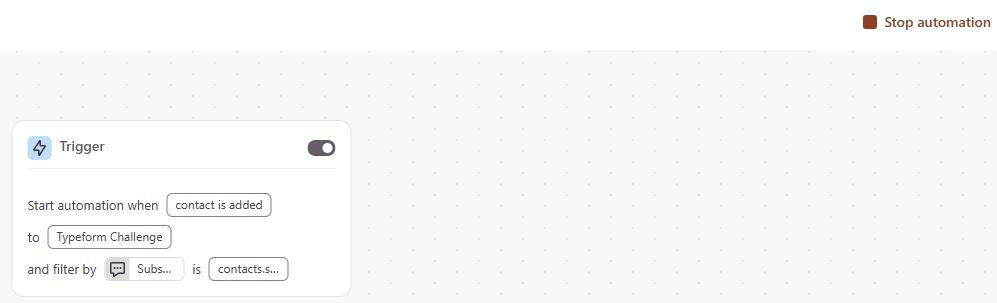
For now, I’m going to cover setting up a basic automation – an email sequence – for when a contact is added to a list. I’ll push the ‘Contact is added to a list’ button and this is where we will start.

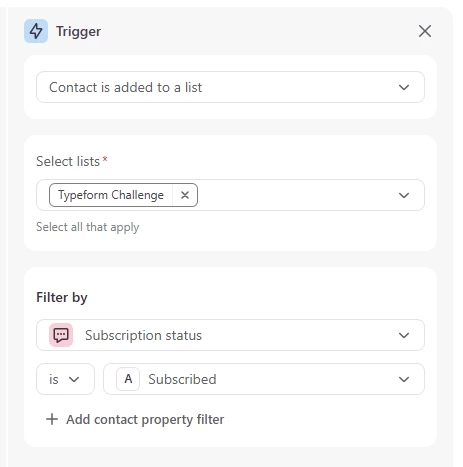
Note the way the screen is laid out – the Trigger block at the top and the + sign below (to add another step to the automation). On the right, you will see the details on the trigger condition and the Select Lists option – choose the appropriate entry from the drop-down.
I am going to add another contact property filter to ensure that only subscribed people get this email sequence. Click on the Add contact property filter on the right hand side of the screen.
Select the Subscription Status property and the filter value of Subscribed, as shown in the image below.
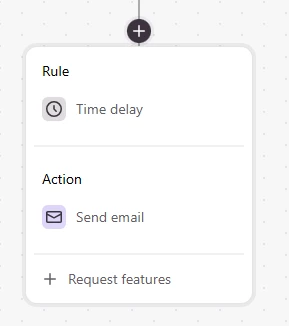
Now, let’s add the action step: click on the + sign below the Trigger box:
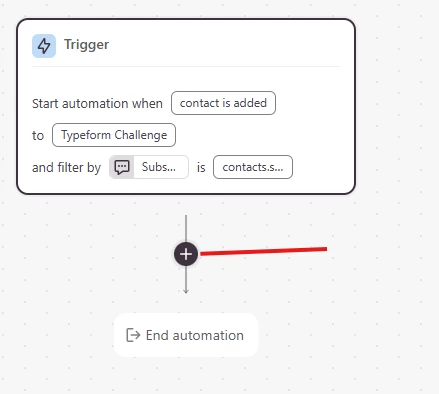
When you click on the + sign, you will see the pop-up box for adding a Rule (a time delay, currently) or an Action (send email). We will ignore the time delay at the moment and this will cause the email we are going to create to be sent immediately that the Trigger condition is met (someone is added to the list).
Click Send Email.
Now we are going to set up the email to send to a Contact. On the right-hand side of your screen you will see the following Action creation panel show up. I’ve underlined the ‘authorized email domain’ that you had set up earlier in this note.
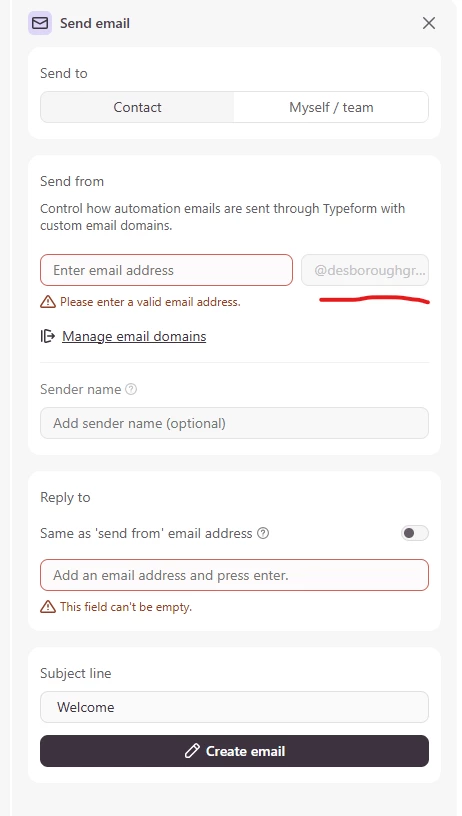
You will need to enter something into the “Enter email address” box – it’s not exactly clear but you can enter any email or email alias that you have set up in your domain. I will add ‘john’ in that box and then my name in the Sender name box and in the Reply to we’ll show the same as the ‘send from’ email.
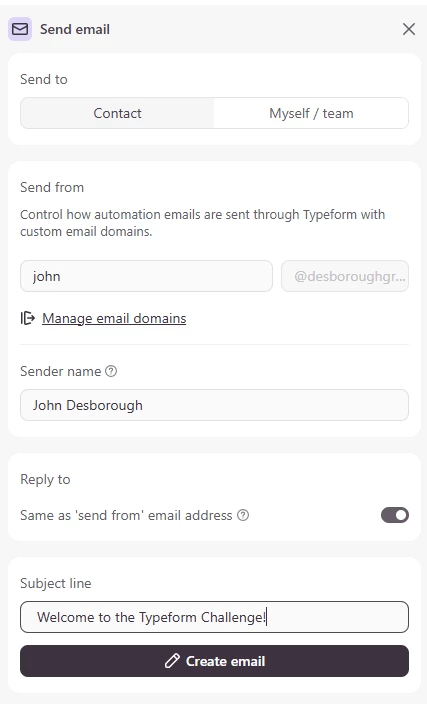
See that the toggle for the Reply to setting is ‘on’ and that I have changed the Subject line of the email as well.
Next hit Create Email.
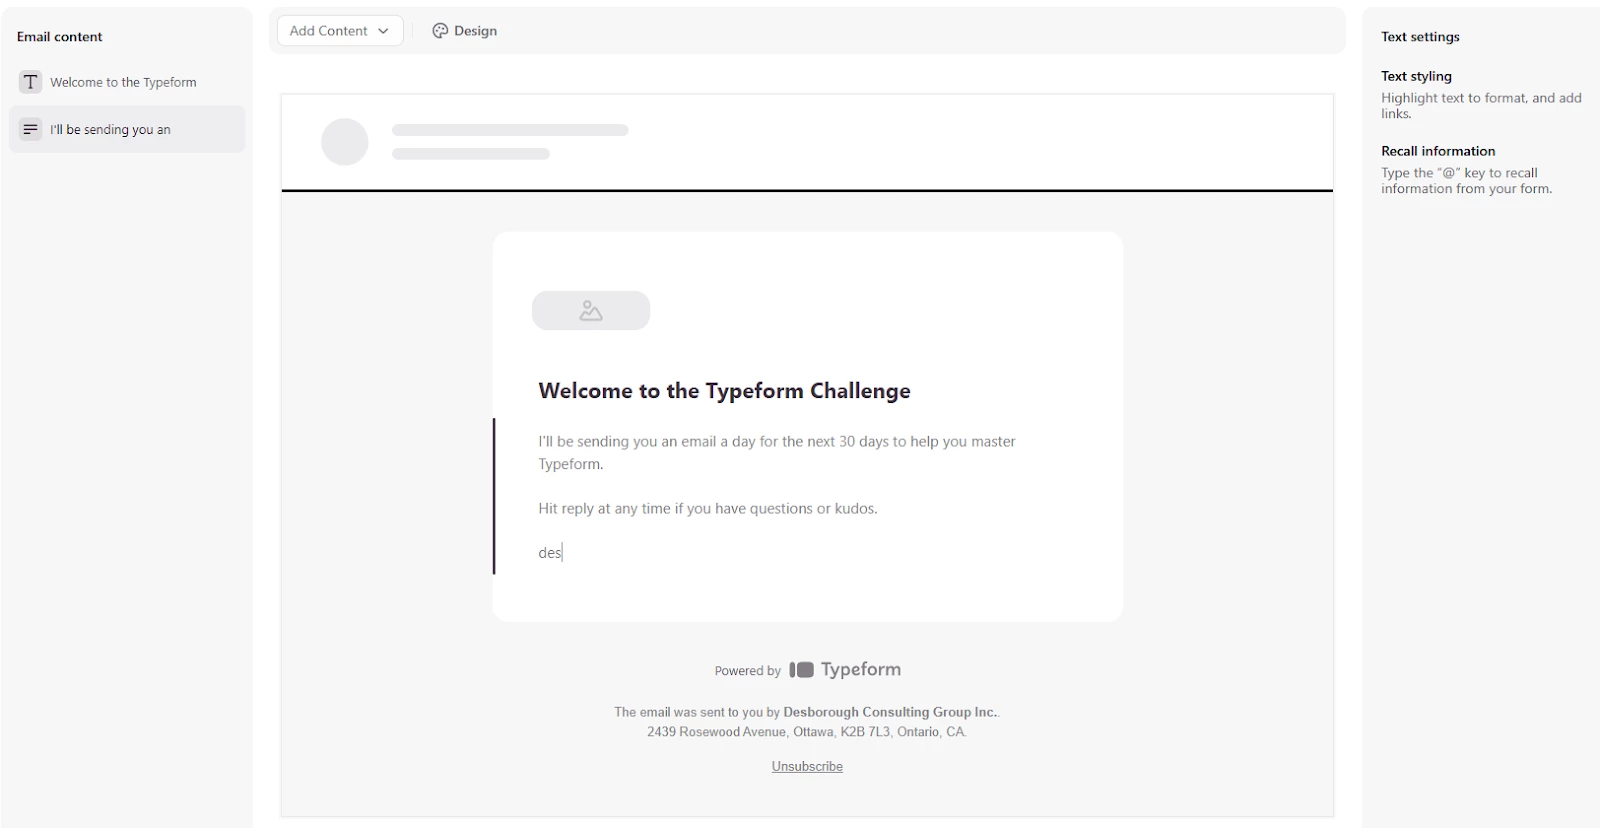
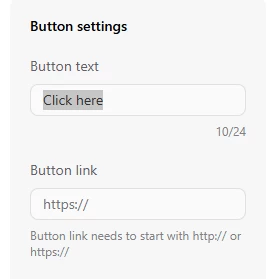
This email interface should be fairly easy to figure out. If you click the ‘Add Content’ drop down in the upper left you can add some different text blocks and even a CTA button. The CTA button allows you to change the text on the button and put in the button link.
If you have created an email theme in your brad kit you also have the ability to select that theme if you choose.
Once you have created your email and saved it, you should see a screen similar to the one below.
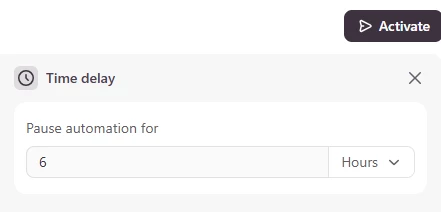
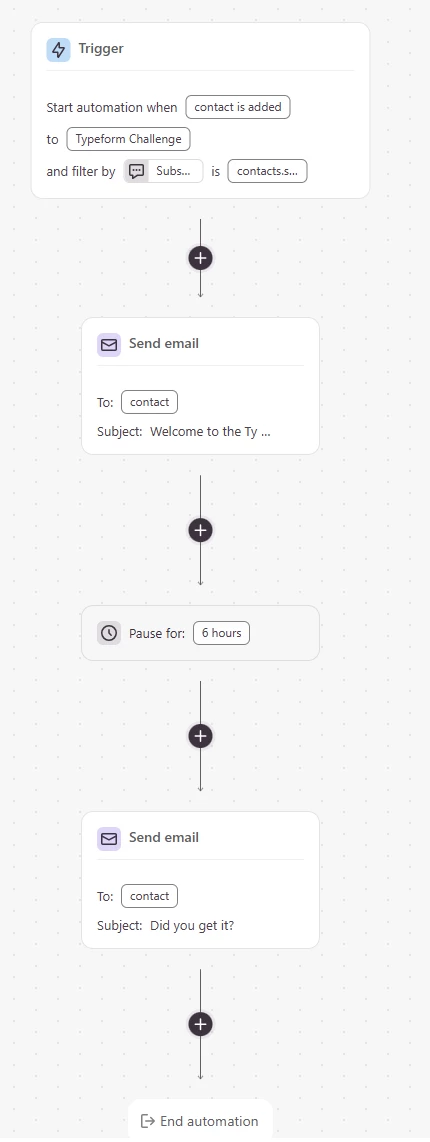
Now let’s add a time delay of 6 hours and send a follow-up email to be sure that they got it.
Click the + sign and choose time delay and in the Time Delay action box that appears on the right hand side of your screen select Hours from the drop down and enter 6 in the ‘Pause automation for’ box.
Then let’s add another simple email that has “Did you get it?” as the subject and asks the user to hit reply and let you know. This, by the way, is a pretty good practice that most email marketers will follow.
Here’s what the automation should now look like on the screen:
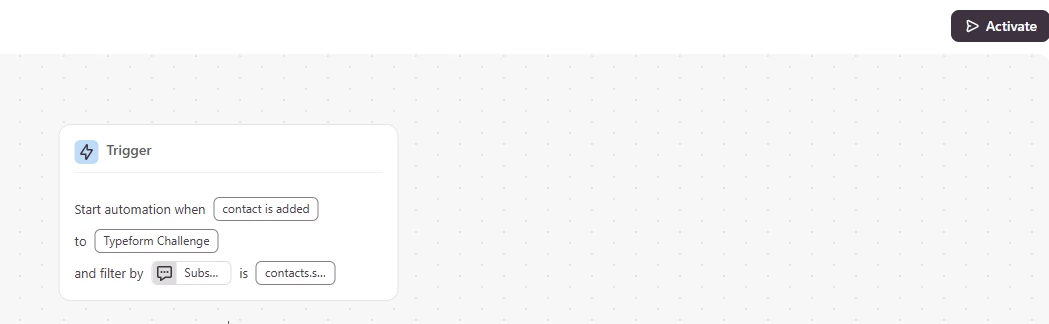
The last step to take to get this automation going is to click the button to ‘Activate’ the email – you’ll see the Activate button in the upper right hand corner of the screen:
Once you ‘activate’ the automation, you will see a toggle on the Trigger block and a ‘Stop automation’ button on the right hand side.
And when you go back to the Automations list of tables, you will see your newly created and activated automation in the list.
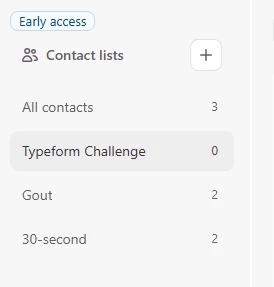
Now any time someone is added to the list (for my Typeform Challenge) they will get the two emails from me – the welcome and the 6-hour ones. I can set up a much longer nurture sequence if I choose to do so.
Limitations of contacts and automations
As I write this in early December 2025, I want to call out some of the things that I think are missing from the automations at this time, features that are available in some of the ESP platforms and CRM solutions. (Note: I have made suggestions to the Typeform Product team about these as well)
- There is no ‘conditional logic’ possibility
- If I use a variable score to rank a response and I want a single automation that has two branches – v_score greater than 5 follow one path and v_score less than or equal to 5 follow another – I am unable to create this currently, I have to create two automations and have them both active – one for each condition
- You can’t apply a ‘tag’ at a point in the automation ie “workflow-name started” and then remove/change the tag at a later stage in the automation (ie ‘workflow-name complete’)
- You can’t trigger an automation based on tags – i.e. if tag is ‘workflow-name complete’ then add this person to another list and start a separate automation
- You can’t ‘exit’ someone from a workflow based on activity in the workflow – i.e. if they open a particular email in the sequence and click through to buy the offer you were nurturing them toward
- I have not tested this out but I think I can see a way to use a Typeform-based order form that submits a record into my Results that would update a contact property of course-name purchased, which in turn would trigger an automation that would remove a contact from a list and end the email automation. That’s sounding do-able but an ugly workaround.
- In the automation flow we see on the screen, you can see any indicator of how many people are currently in the automation flow and where they are ie 6 have gone through step 1, 4 through step 2 and 1 completed.
- There isn’t a dashboard in the Contacts area that tells you which automations a contact has been through
- This is where I think the ‘tags’ would be helpful.
I’m going to stop there for now.
I’ll cover how to set up an automation if a contact re-takes a quiz and the new result should kick off an automation – they are not a new contact and not new to a list in this scenario, but let’s say they have moved from a ‘warm lead’ to a ‘hot lead’. How do you initiate the automation to kick that new sequence off?
Till next time.
des
For more resources on Contacts and Automations, check out these links:
